|
|
| 1. |
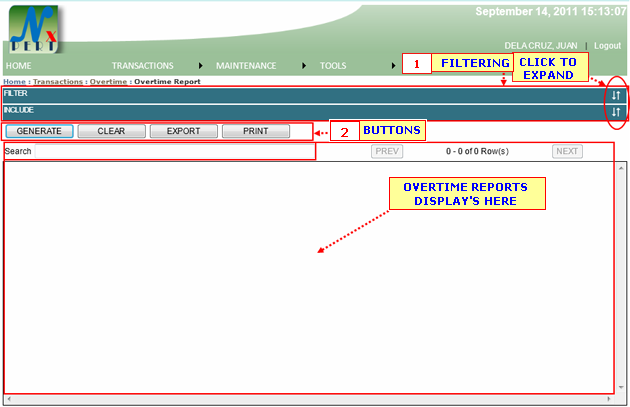
FILTERING: Filtering is use to select specific details or informations to be viewed only or to be print-out as specified by the user.
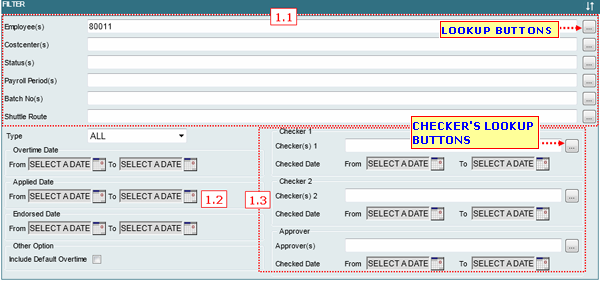
1.1You can filter Overtime Report by its Employee, Costcenter, Status, Payroll Period, Batch No, Shuttle Route.
Each informations are constantly designed, for you to do the same procedures:
You can type an informations directly from the space provided for you or view its list from the lookup window by cliking the lookup button.
Assume you have click the lookup button.
Lookup for EMPLOYEE:
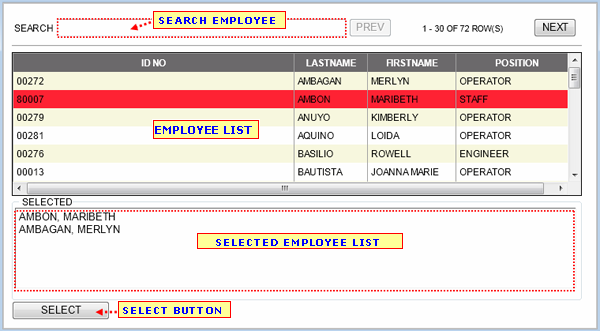
- You may use the SEARCH BOX to search for a specific detail/information.
- From the employee list, select a row to be included in the selected list by clicking it ones.
- From the selected list, exlude employee by double clicking on it.
- You may use the "SELECT" button to select all employees from the selected list.
|
|
Note: You may double click a row from the list to select an information directly.
Note: You may follow the same procedures in selecting informations for other lookups.
|
|
TYPE: You can filter a type of Leave.
![]()
- Default is "ALL" for both POST and ADVANCE type.
- POST Overtime type is after the shift.
- ADVANCE Overtime type is prior to shift.
You can filter date by its OVERTIME DATE, DATE APPLIED, and ENDORSED DATE. To select A date click this icon ![]() . .
1.3 CHECKERS/APPROVERS: This is where you can filter Leave Report by Checkers and its Date Checked.
Lookup for Checkers:
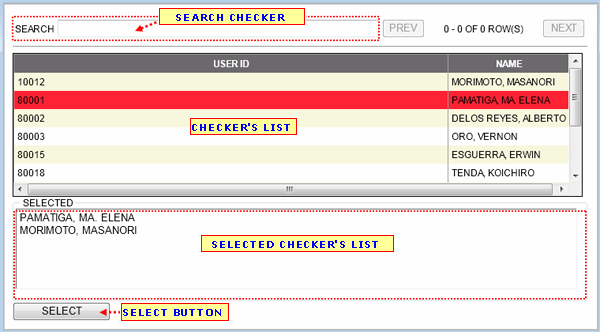
- You may use the SEARCH BOX to search for a specific detail/information.
- From the Checker's list, select a row to be included in the selected list by clicking it ones.
- From the selected list, exlude costcenter by double clicking on it.
- You may use the "SELECT" button to to select all costcenters from the selected list.
|
|
Note: You may double click a row from the list to select an information directly.
Note: You may follow the same procedures in selecting informations for other lookups.
|
|
Cheked Date: You can filter checkers by when its date checked. Click this icon to select date. ![]()
INCLUDE: Is use to select specific Column Header to be inluded in reports.

- A user may click on the box to check/uncheck column.
- Put a cheked mark on the box to inlude column in reports. If not just leave un-checked.
|
|
|
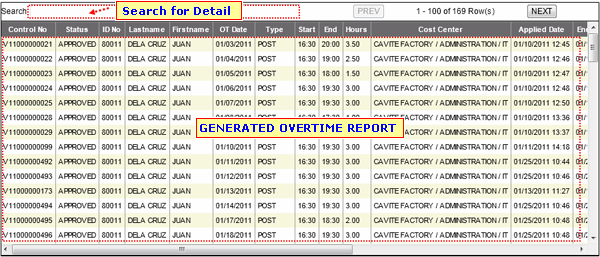
GENERATE button: A user may click this button to display result for report.
When a user click the "GENERATE BUTTON" result will display as shown below:
CLEAR button: A user may click this button to clear out or empty the result.
EXPORT button:
PRINT button: To print report(s) from the Result List.
CANCEL button: Use to cancel Report.
|
