| 1. |
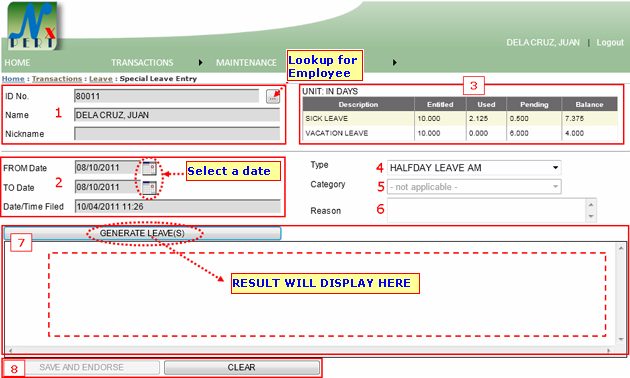
Employee's Information: This is where the current logged user's basic information appears. With ID No., Name, and Nickname.
A user may file an entry for another employee (depending on the system's access grant for users) by clicking the lookup button for employee.
Assume you have clicked the lookup button for Employee, then the system will pop-up another window:
Lookup for Employee:
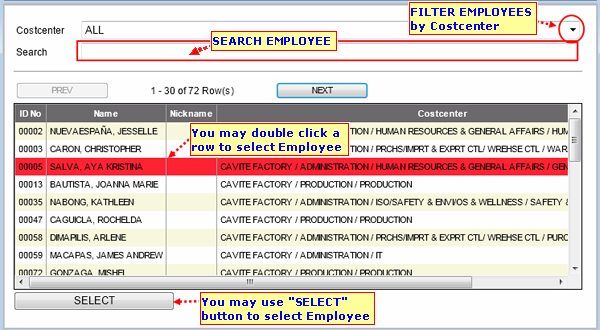
- This pop-up window retrieves lists of all employees from a data source record.
- You may filter an employee by its Costcenter.
- You may select a row from the list and click the button SELECT to select employee. (Selected row is highlighted with red color background)
|
| Note: Filing an entry to another employee is only applicable for users who have an access grant from the system. You may ask your system administrator for further assistance. |
|
| 2. |
(A.) FROM Date - TO Date: This will cover a number of day(s) depending to the selection of dates.-
(B.) Click this  icon to view callendar where you can pick a date. icon to view callendar where you can pick a date.
(C.) DATE/TIME Filed: Displays the current date and time.
|
|
| 3. |
UNIT:IN DAYS
|
|
|
Note: This area can only be seen depending on the user whose currently logged. |
|
| 4. |
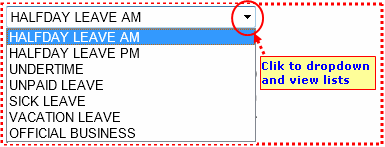
Select a type of leave by clicking the dropdown button.
|
|
Note: Some lists may not available to other users. |
|
| 5. |
Select a category by clicking the dropdown button. |
|
Note: This dropdown list is only applicable depending to what type of Leave you previously selected. And may not also be applicable to other users. |
|
| 6. |
State a reaon why you are filing leave. |
|
| 7. |
By clicking the "Generate Leave(s)" button, a number of leaves will display inside the box depending of the range of days you provided for "FROM Date" and "TO Date".

- You may mark a check-box by clicking on it, checked or unchecked.
- Checked mark means to include in transaction.
- UnChecked mark means to exclude in transaction.
|
|
| 9. |
Click "SAVE AND ENDORSE" button when done filing. This will save and endorse transaction.
This message from the WEB prompts if transaction was successfully saved and endorsed. Click OK to continue.
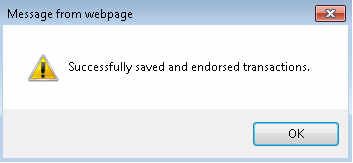
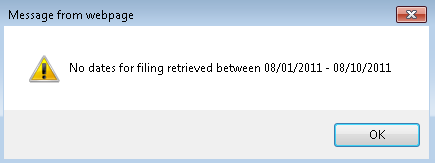
This message from the WEB prompts if there is no filed dates to be retieved. Click OK to continue.
You may use the "CLEAR" button to clear out some fields.
|
